 A Supervisor (authorized user) is a user who oversees a call center and manages specific configuration settings for the call center and Call Queue in Teams.
This role is assigned by an admin.
Transform Call Queue Management with Teams Phone
As a supervisor, Teams Phone gives you powerful tools to manage call queues and monitor agent performance, including:
- Modify greetings, voicemail prompts, call routing flows, business hours, and other queue or attendant settings.
- New visibility into queue operations
- Real-time agent presence and participation
- Dynamic membership management
- Detailed call metrics
- Real-time dashboards and statistics
- Enhanced reporting capabilities
- Powerful new queue management tools
Default Call Center Settings
Call Centers have the following default settings:
- No greeting
- Routing Method: Attendant routing
- Call agents can opt out of taking calls
- Call overflow: Maximum number of calls in queue is set to 3
- When the maximum number of calls is reached, calls are redirected to voicemail.
- Maximum wait time: 1 minute
- When the caller waits more than the maximum wait time, calls are redirected to voicemail.
- When no agents are available, calls are redirected to voicemail.
- Voicemail greeting: We are not available to take your call at this time. Please stay on the line to leave a voicemail.
- Transcription of voicemails: On
Supervisor Capabilities
Supervisors, granted access by an admin, can:
- Select Settings and more
next to your profile picture at the top of Teams.
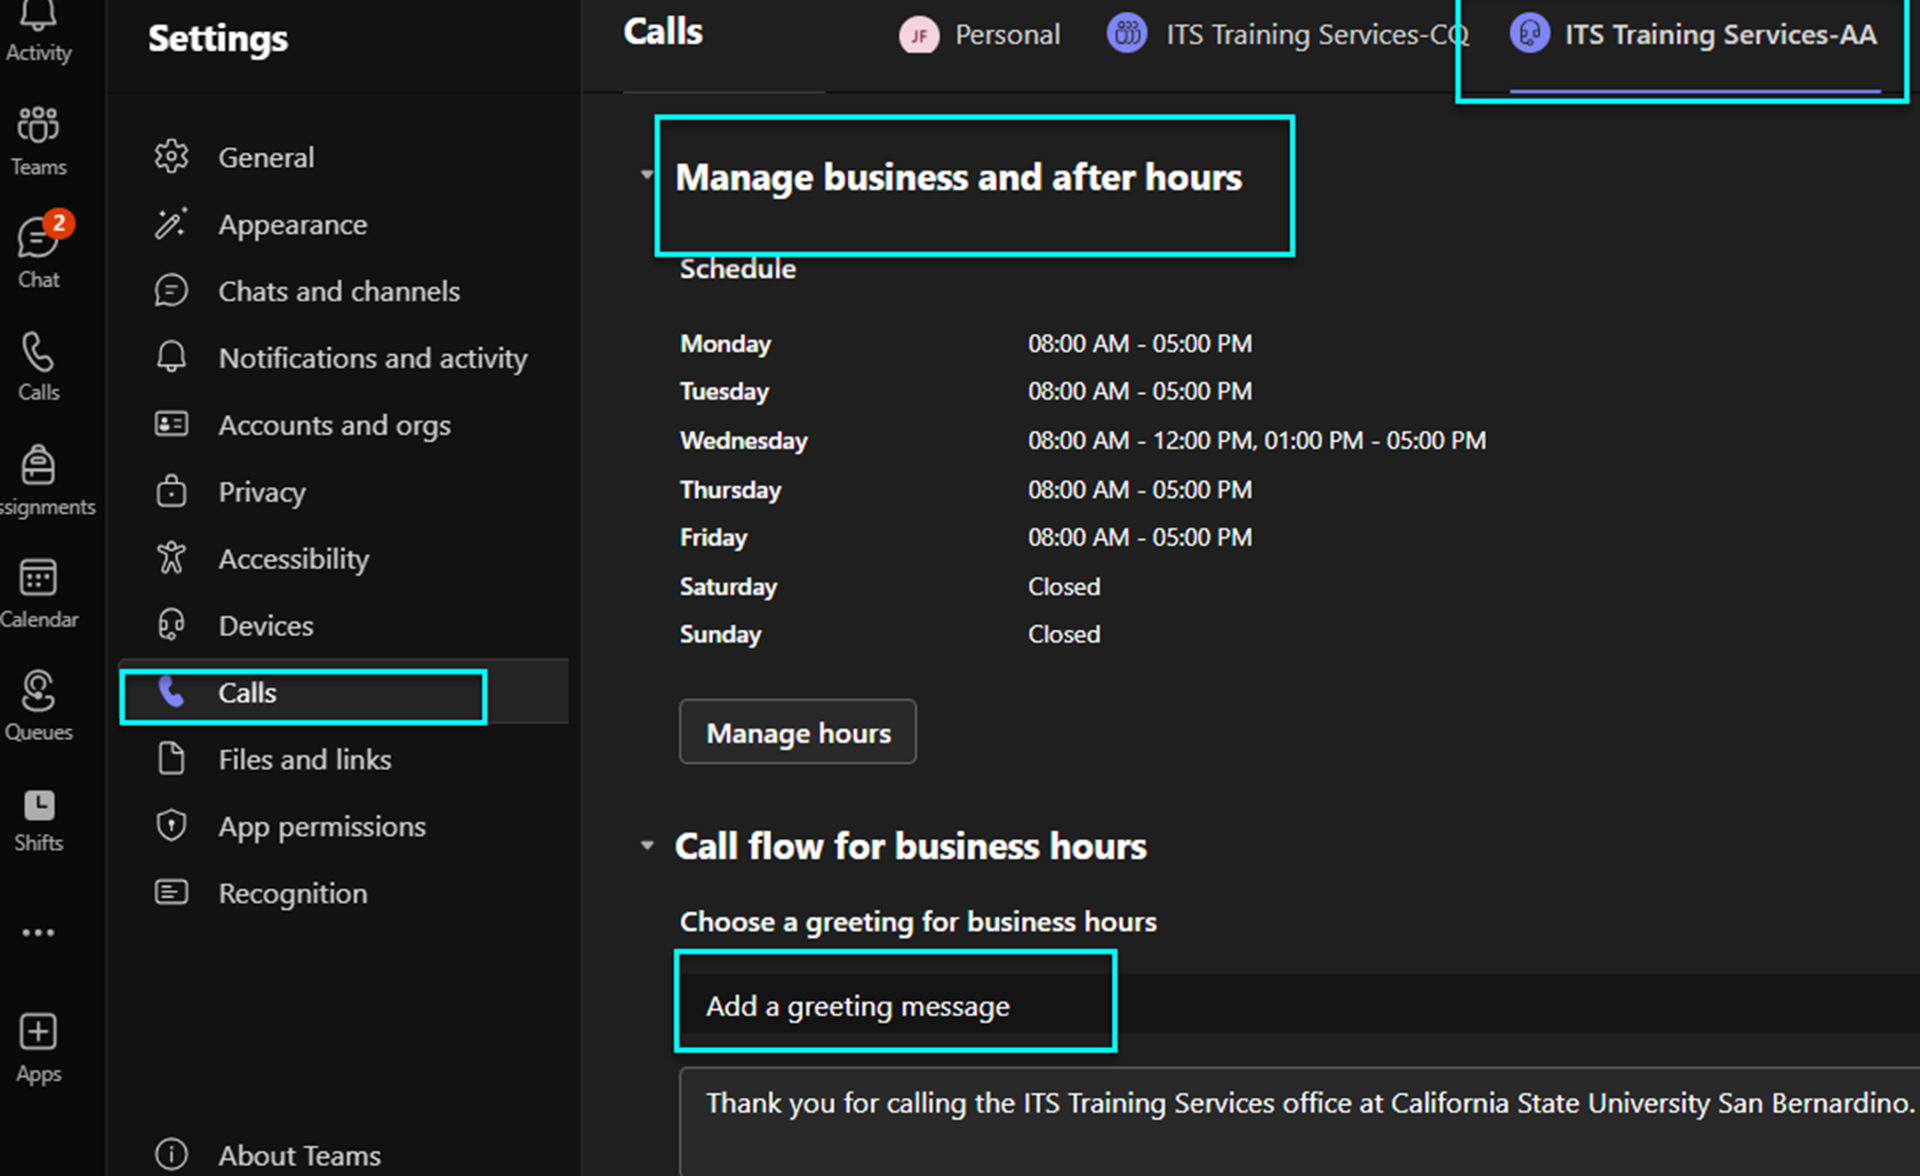
- Select Settings
.
- Go to Calls
.
- Select your Call Center at the top.
- Under Manage business and after hours, click on Manage hours.
- Enter the hours as desired.
- Open Microsoft Teams.

- Click Queues (use More (…) if you don’t see it).
- Select the call queue you manage.
- Go to the Settings tab.
- Configure Call handling (sometimes labeled Exception handling):
- Routing method: choose Attendant, Round robin, Serial, or Longest idle.
- Greeting & prompts: set the incoming greeting and music on hold as needed.
- Overflow: set the maximum queue size and choose an overflow destination (e.g., another queue, user, voicemail, or Teams channel).
- Timeout: set the maximum wait time and choose a timeout destination.
- Business hours & holidays: (if available) set after-hours routing and holiday schedules.
Select Settings and more
next to your profile picture at the top of Teams.
- Select Settings
- Go to Calls
- Select your Call Center at the top.
- Under Call flow for business hours, click on Add a greeting message.
- Enter the message.
Access the settings in Teams for the Auto Attendant
- Open Teams.
- Select
- Select Settings
- Go to
- Select the Auto Attendant (ends in -AA) in the top next to Personal
- Scroll down to access the different settings.
- The Greetings are in the section Call flow for business hours
- Click Add a greeting message if there is not one currently.
- The Greeting options are the last item before Call flow after hours.
- You may edit the options, the message for the spoken menu, etc.
 Open Microsoft Teams.
- Click the Teams tab
.
- In the Teams pane, select the desired Team.
- Click Manage team.
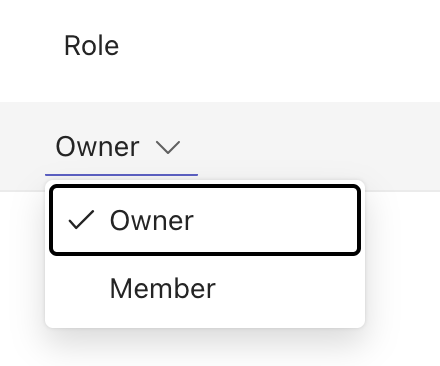
- Click Members at the top
- Open Microsoft Teams.
- Click the Teams tab
- In the Teams pane, select the desired Team.
- Click the ellipsis (···) next to the team name.
- Click Manage team.
- Click Members at the top
- On the row for the member desired, click the drop down under Role and change it to the desired role.
- Open Microsoft Teams.
- Click the Teams tab
- In the Teams pane, select the desired Team.
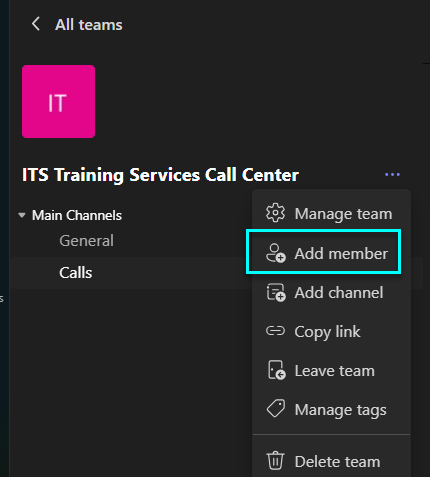
- Select the ellipsis (··· More options) next to the Team name.
- Choose Add member.
- Enter the name or email of the person.
Click Add if you are the owner. Click Send request if you are not.
Note: If you are not an owner, a request will be sent to the owner to add them.
- Open Microsoft Teams.
- Click the Teams tab
- In the Teams pane, select the desired Team.
- Select the ellipsis (··· More options) next to the Team name.
- Choose Manage team.
- Click Members at the top
- On the row for the member desired, click the X on the right to remove them from the Team and call queue.
Note: If you only want to temporarily remove them from answering calls, see the steps below on how to opt-out and agent from a call queue. Only the supervisor of the call queue can do this through the Queues app.
 Must be completed in the Queues app within Teams.
- Click Queues on the left. (If you don’t see it, click the ... More option and type Queues).
- Select the call queue you manage.
- Move your mouse over the desired agent and click the ... that appears on the right.
- Click Opt-out or Opt-in.
Queues App
Below are some basic guides to get started. Other features and methods are available at Microsoft Supervisor Call Queue topics.
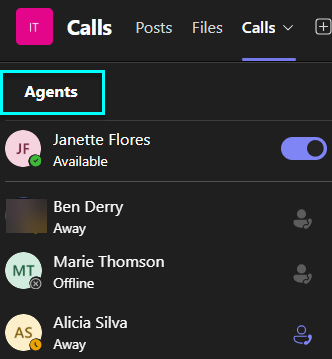
Real-time agent status monitoring (current day)
As a supervisor, you can view agent availability in two ways , through the Calls tab in Teams or by using the Queues app.
Option 1: Using the Calls Tab
- Click Teams.
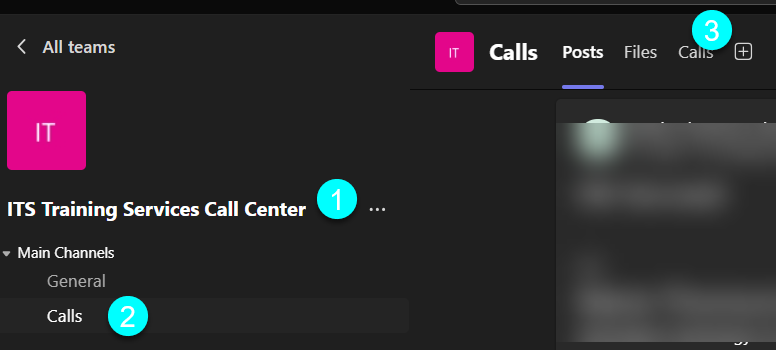
- Select the Calls tab on the left-hand side.
- Then, select Calls again at the top of the page.
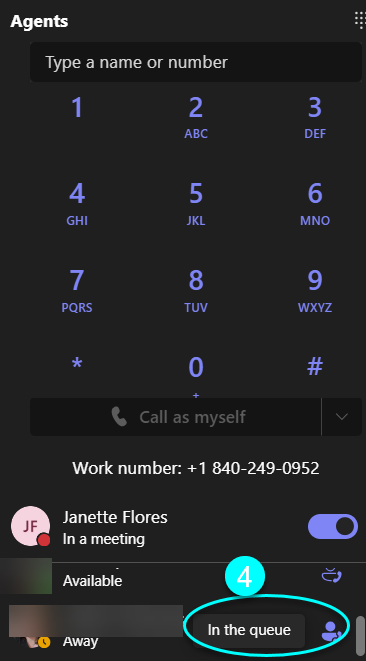
- You’ll be able to view which agents are available.
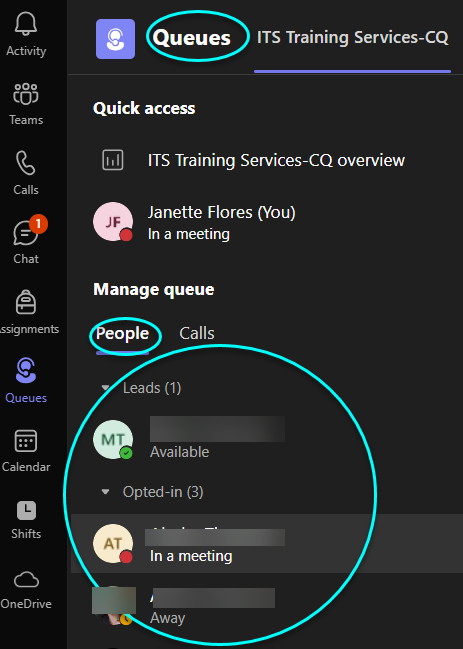
Option 2: Using the Queues App
- Open the Queues app in Teams.
- From there, you can also view agent availability and queue activity.
Must be completed in the Queues app within Teams.
- Click Queues on the left. (If you don’t see it, click the ... More option and type Queues).
- Select the call queue you manage.
- Move your mouse over the desired agent and click the ... that appears on the right.
- Click Opt-out or Opt-in.
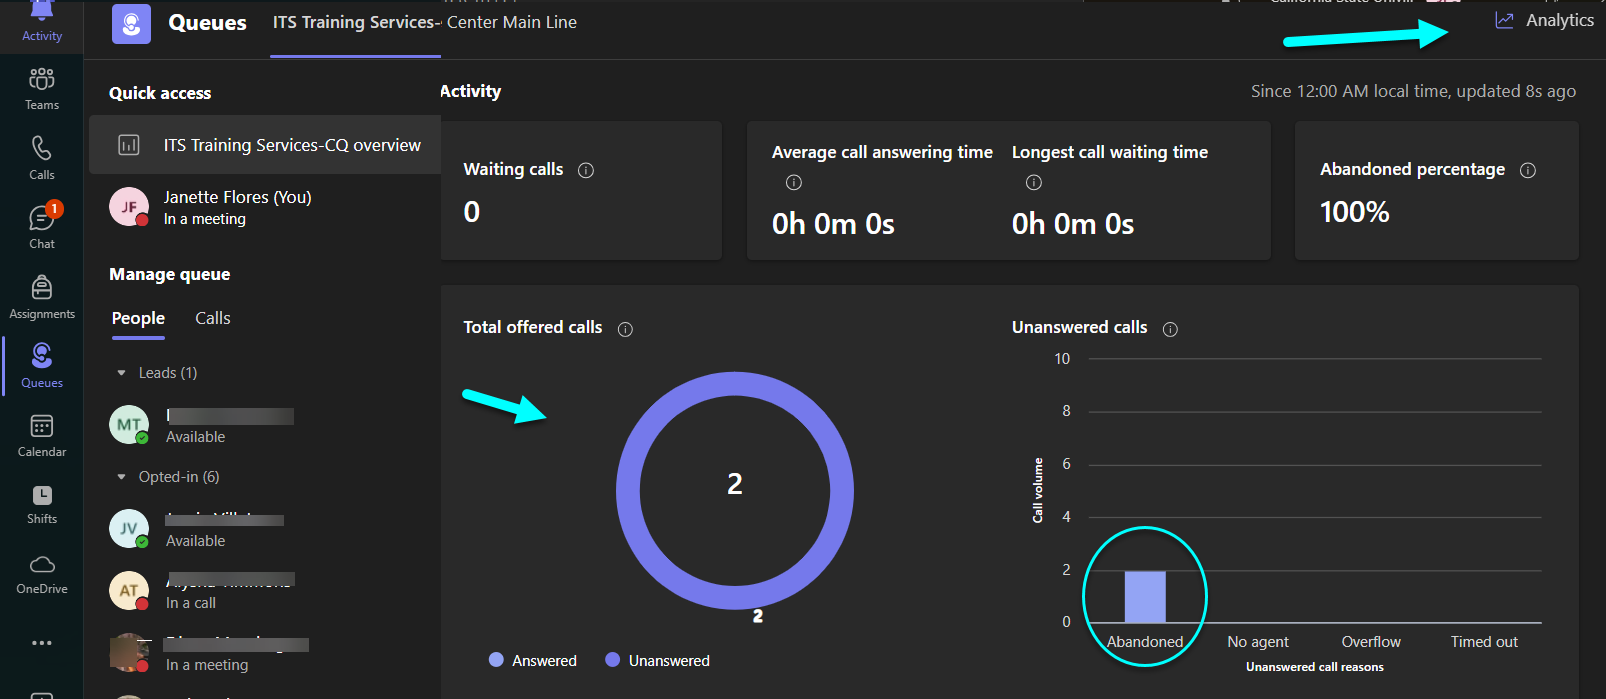
To View Call Volume Using the “Queues” App in Teams
- Open the Queues app in Teams.
- Select the queue you manage.
- You’ll be able to view key metrics such as:
- Number of active calls
- Agents available/unavailable
- Recent call history and missed calls
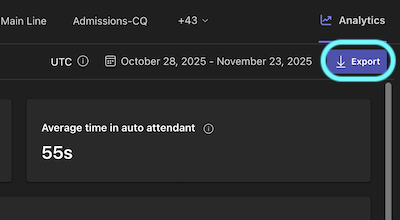
For more customized analytics, click the Analytics link in the top-right corner.
Reports (Historical)
- Open the Queues app in Teams.
- It defaults to showing real-time analytics for the current day.
For more customized analytics, click the Analytics link in the top-right corner.
Click Historical to view a different day or time period.

- Select the queue you manage.
Change the time period if desired.

- View the visual graphics on the screen, move your mouse over the Abandoned graph to see daily totals.
To Export to a csv file that can be opened in Excel, click Export in the top right.