If you haven't already done so, proceed with the InCommon invitation process.
To start using personal certificates with Outlook (or Chrome or IE or Edge) in Windows, you'll need to complete a few phases of configuration below. (The following will not work with Firefox.)
Import Your Certificate
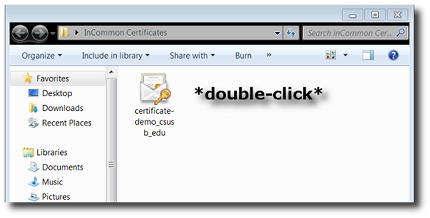
Double click the downloaded and saved personal certificate file. This will start the Certificate Import Wizard.
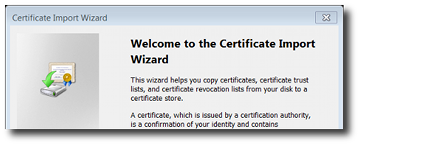
The wizard begins …
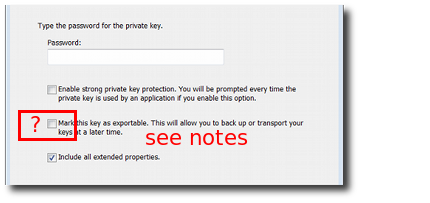
The default import options are satisfactory for most purposes.
Selecting the "mark key as exportable" is optional but useful. It's a less-secure method of storing the key, but it will allow you a second method of creating a backup of your certificate and key, using tools such as the Certificate MMC snap-in.
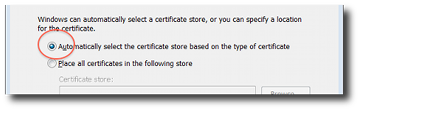
Windows will automatically select the appropriate store for your personal certificate.
NOTE: If you only need the certificate for using applications that you access with IE or Edge or Chrome in Windows, you are done at this point. You can, optionally, configure Outlook below to allow signing/encrypting e-mail messages.
Signing Your First Email
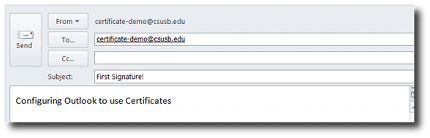
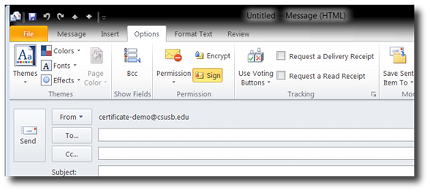
After importing your certificate, open Outlook and compose a new, self-addressed test email.
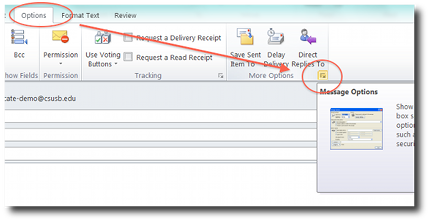
From the Options tab of the ribbon, find "More Options".
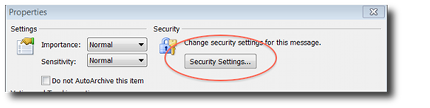
A new Options window appears. Click Security Settings…
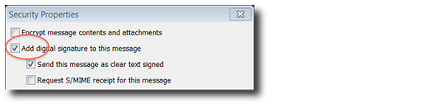
Select the checkbox for Add a digital signature.
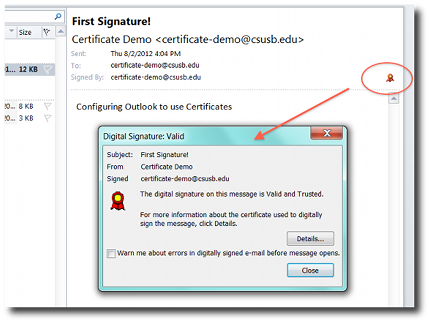
Send your email. Then, check your Inbox for a signed message.
Signing Future Email
In the future, the sign and encrypt options will be available directly from the ribbon.